


DQ3 Remake: Baramos Labyrinth Guide
Conquer Baramos's Lair in Dragon Quest 3 Remake: A Comprehensive Guide
After securing the Six Orbs and hatching Ramia, the Everbird, you're ready to tackle Baramos's Lair in Dragon Quest 3 Remake. This challenging dungeon serves as the ultimate test before venturing into the game's underworld. This guide will detail how to locate and complete Baramos's Lair in Dragon Quest III HD-2D Remake.
Baramos's Lair is the formidable stronghold of the Archfiend Baramos, the primary antagonist in the game's first half. Access is granted only after acquiring Ramia, who provides aerial transport to the lair's secluded valley location. Aim for a party level of at least 20 before attempting this challenging encounter. The dungeon holds several valuable items, detailed in the sections below.
Reaching Baramos's Lair
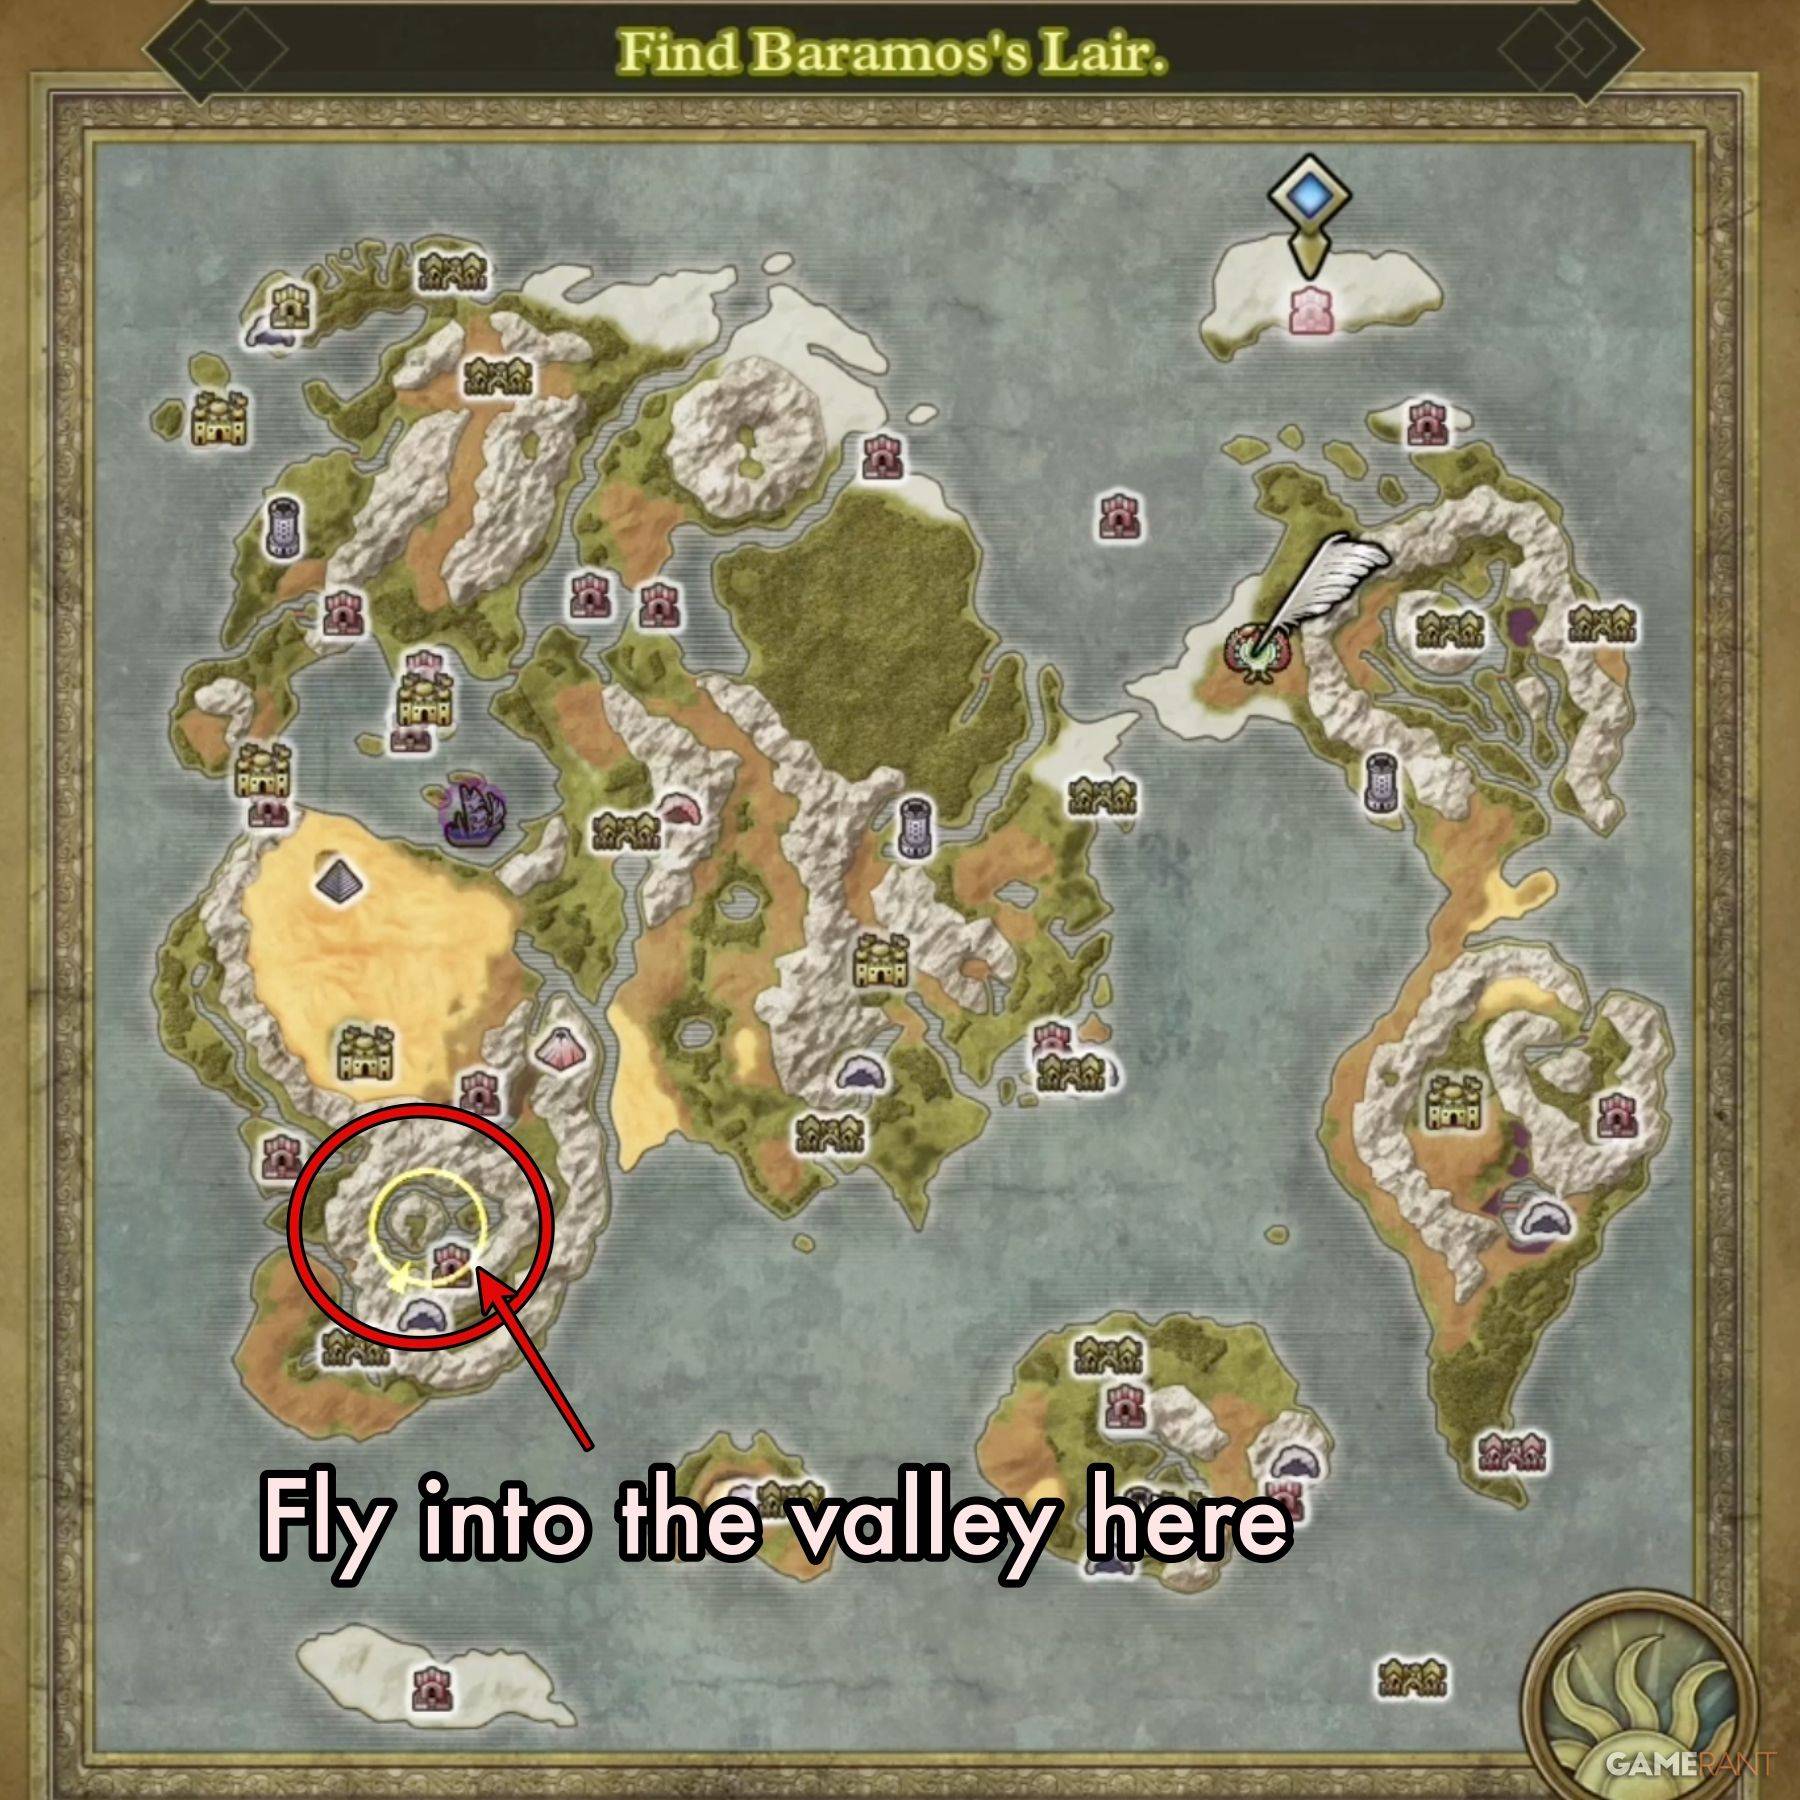 Following the completion of the Maw of the Necrogond and acquisition of the Silver Orb, Ramia, the Everbird, becomes available. Access Baramos's Lair via flight from either the Shrine of the Everbird or the Necrogond Shrine.
North of the Necrogond Shrine lies an island nestled amidst mountains – the location of Baramos's Lair. Ramia will transport you directly to the dungeon's entrance. Simply proceed north and enter.
Navigating Baramos's Lair
Baramos's Lair in DQ3 Remake differs significantly from other major dungeons. Instead of a linear progression, you'll traverse a series of interconnected indoor and outdoor areas to reach Baramos.
The initial area, "Baramos's Lair – Surroundings," serves as the central outdoor hub, acting as a transition point between the various structures. The following outlines the optimal path to the boss fight, with treasure locations detailed separately for each section.
Reaching Baramos: The Optimal Route
- Upon entering Baramos's Lair from the overworld, bypass the main entrance. Instead, navigate east around the castle towards the northeastern pool.
- Ascend the stairs leading to the pool, then turn left (west) to another stair set. Climb and locate a door to your right; enter.
- Inside the Eastern Tower, proceed to the top and exit.
- You're now on the castle roof. Traverse southwest, descend the stairs, continue west, and pass through the gaps in the northwestern double wall. Use the northwestern stair set.
- The stairs lead to the Central Tower. Proceed southwest, utilizing the Safe Passage spell to cross electrified floor panels. Descend the stairs to B1 Passageway A.
- In B1 Passageway A, turn east and follow the path to the eastern stairs.
- Enter the South-East Tower. Head northeast to the stairs, ascend to the roof, then head west and descend again. Cross the grass northwest and enter the only available door.
- This door leads to a small section in the northeast corner of the Central Tower. Exit via the only available path.
- You're now in B1 Passageway B. Proceed north and ascend the stairs.
- You've reached the Throne Room. Navigate south to the exit, avoiding floor panels.
- Back in the Surroundings area, locate the large structure in the northwest (the Throne Room). Proceed east to the northeastern structure on the island in the lake – Baramos's Den, the boss arena.
Treasure Locations
Surroundings Treasure:
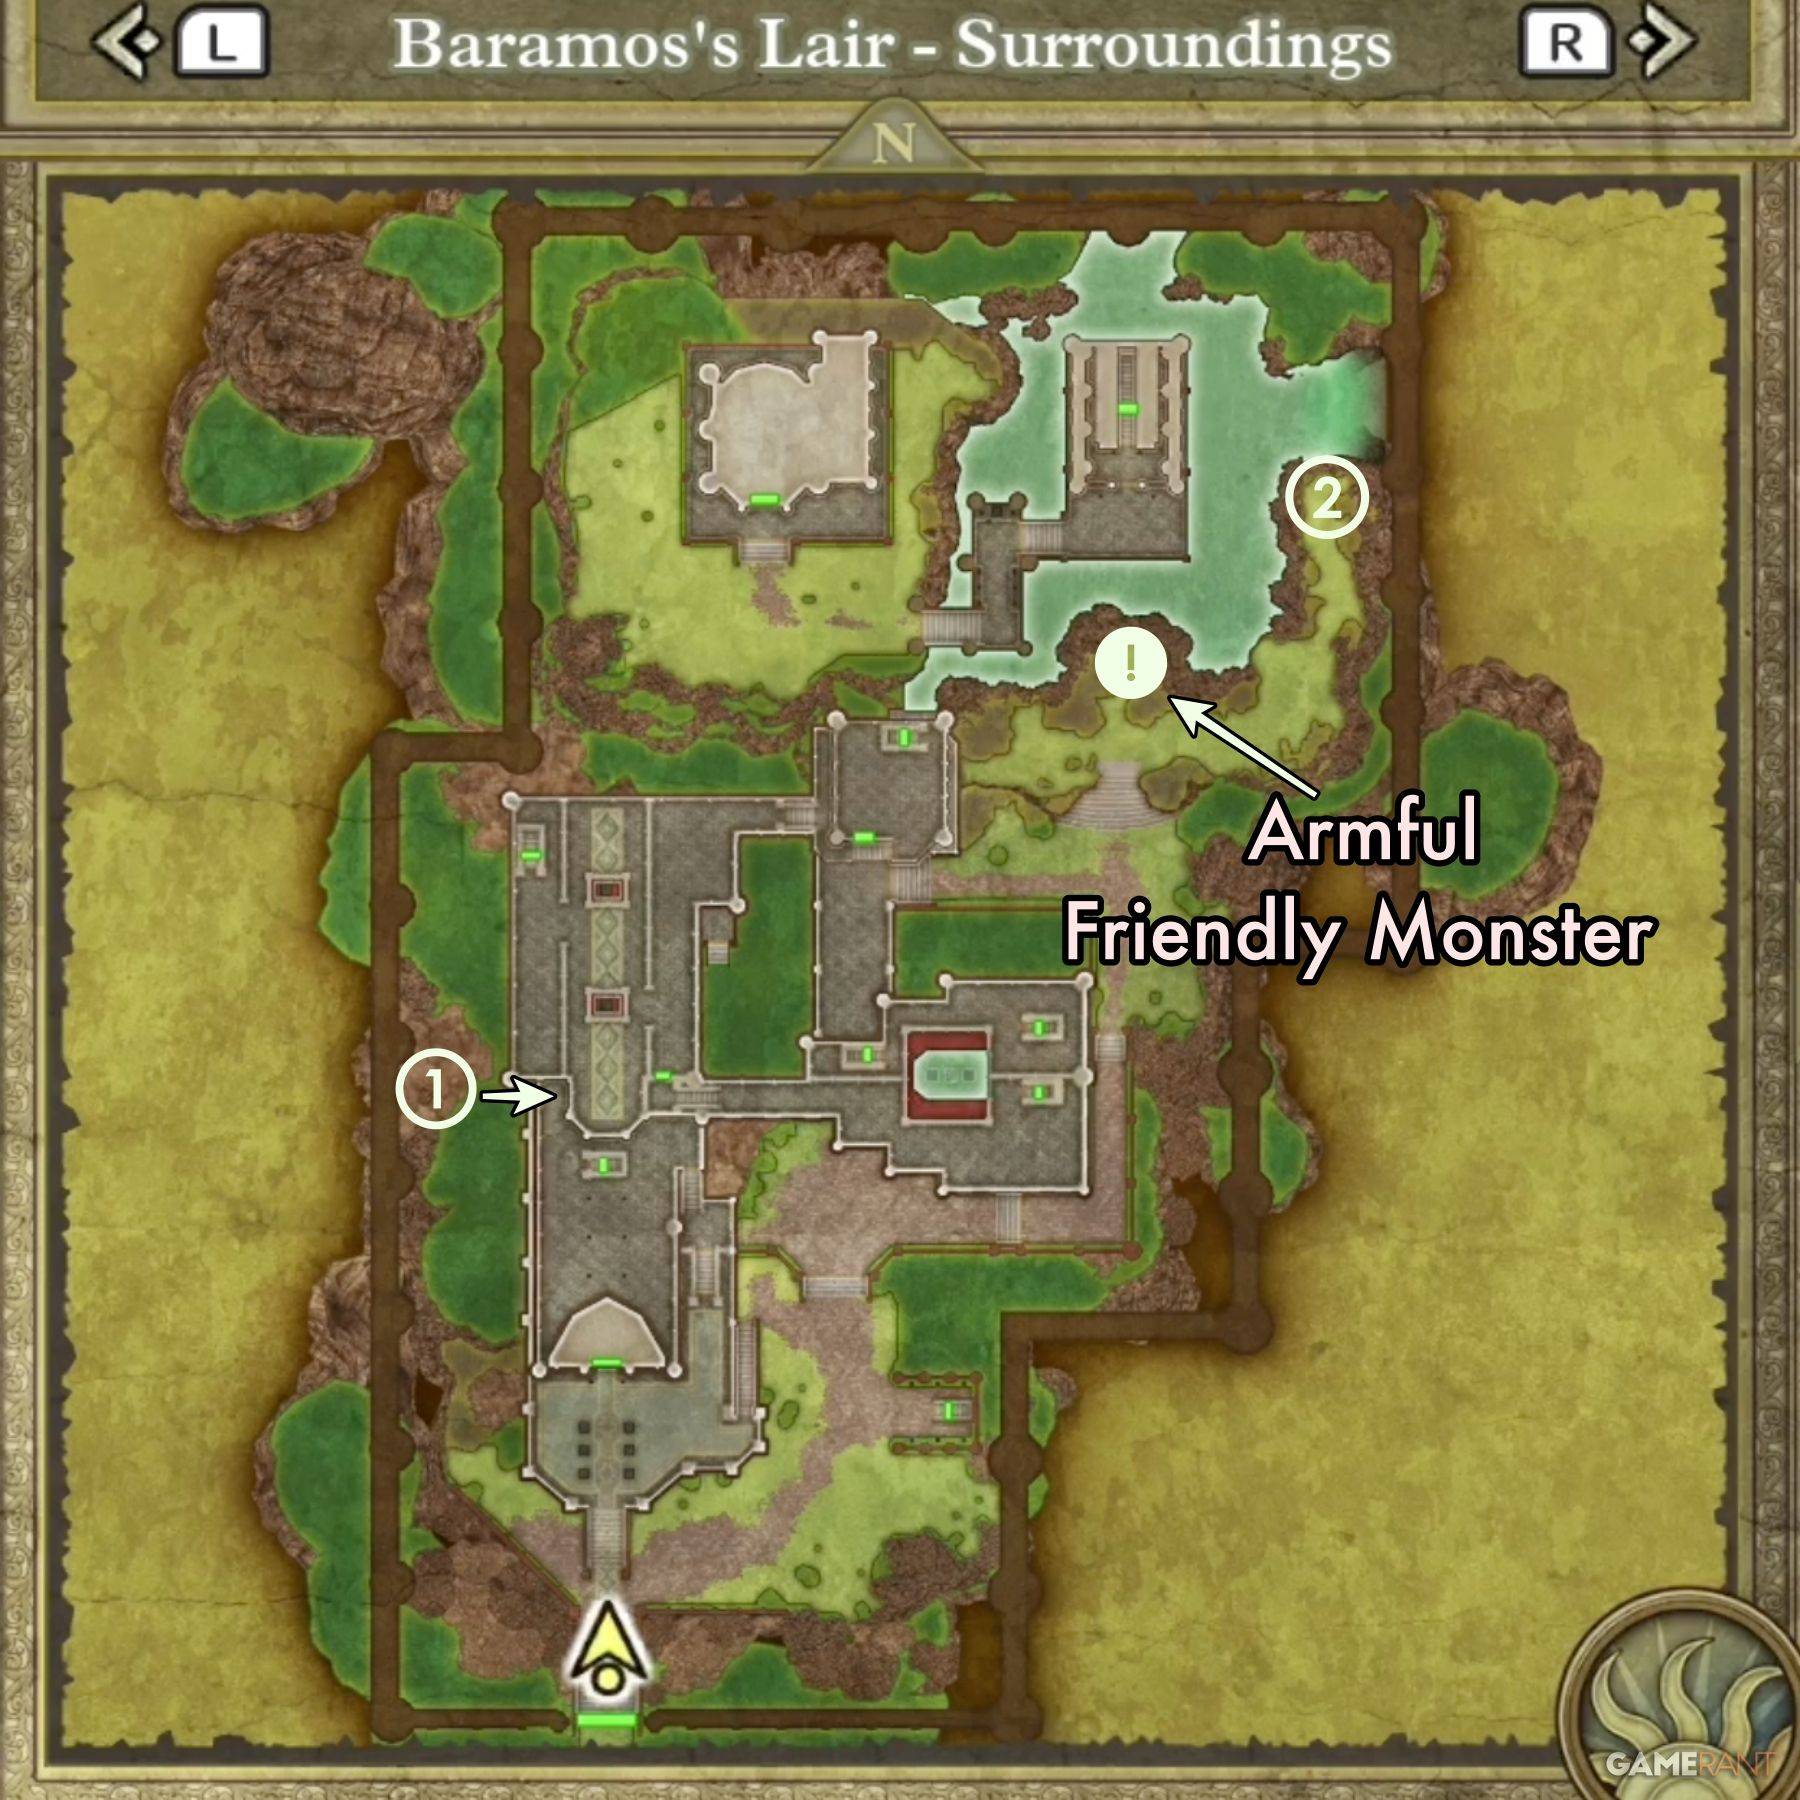
- Treasure 1 (Chest): Prayer Ring
- Treasure 2 (Buried): Flowing Dress
Note: An Armful (Friendly Monster) resides in this area.
Central Tower Treasure:
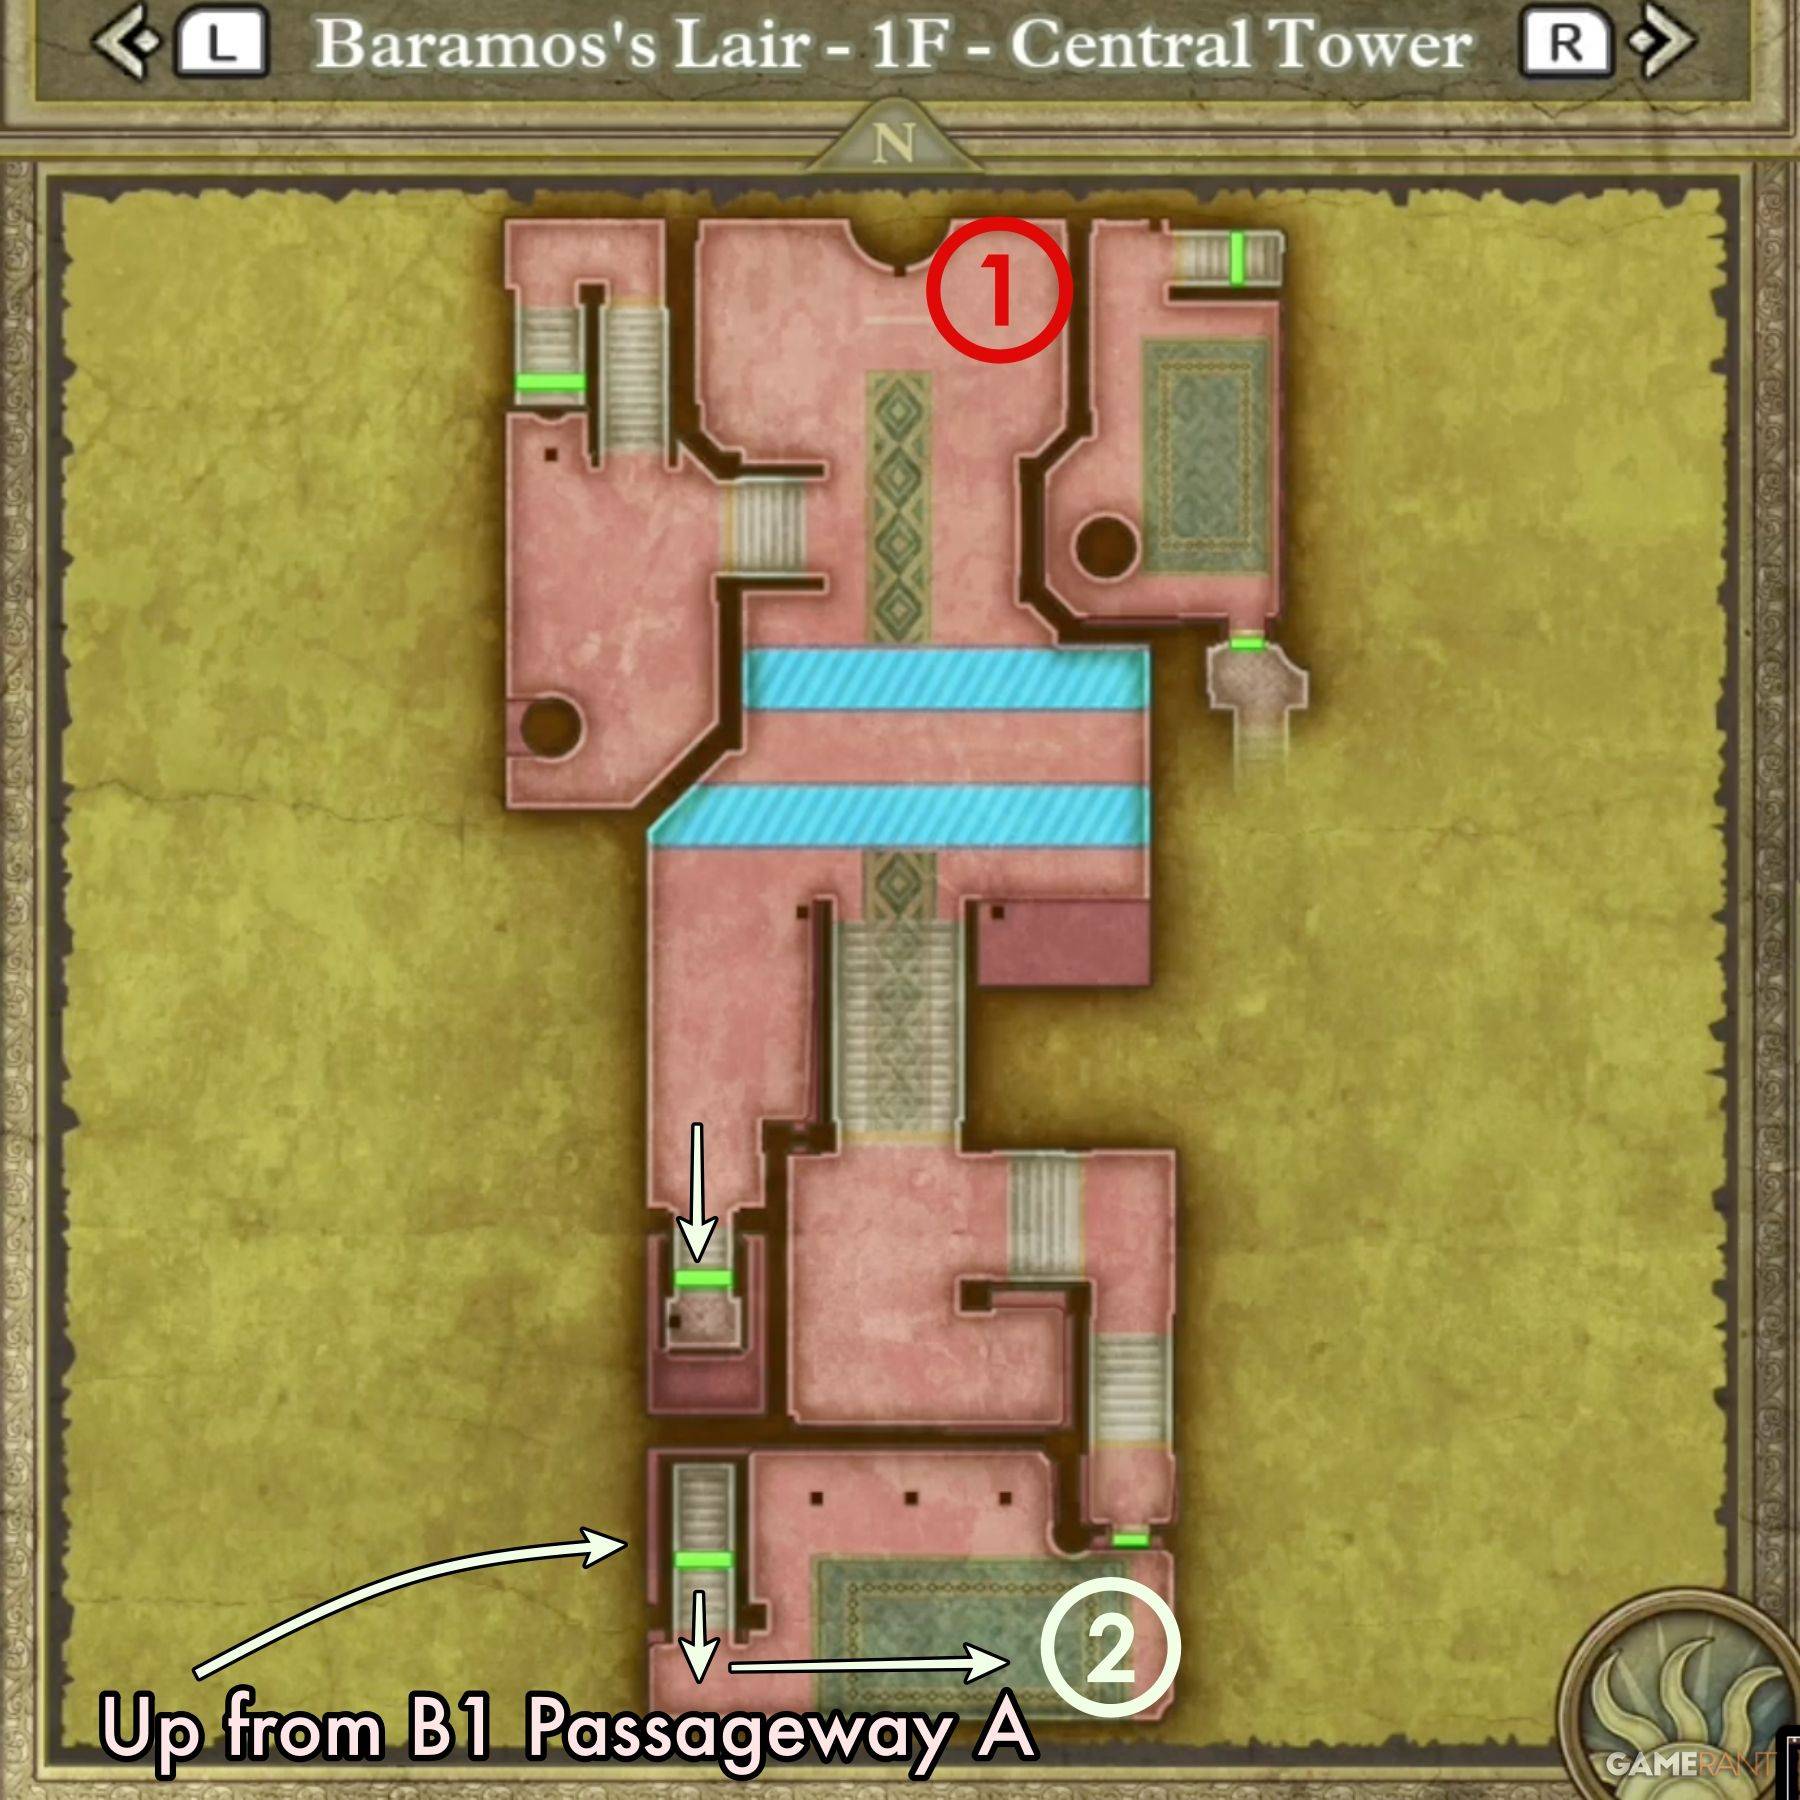
- Treasure 1: Mimic (enemy)
- Treasure 2: Dragon Mail
South-East Tower Treasure:

- Treasure 1 (Chest): Hapless Helm
- Treasure 2 (Chest): Sage's Elixir
- Treasure 3 (Chest): Headsman's Axe
- Treasure 4 (Chest): Zombiesbane
(Access these chests from the Central Tower via the southeastern exit, crossing the roof and descending the stairs.)
B1 Passageway Treasure:
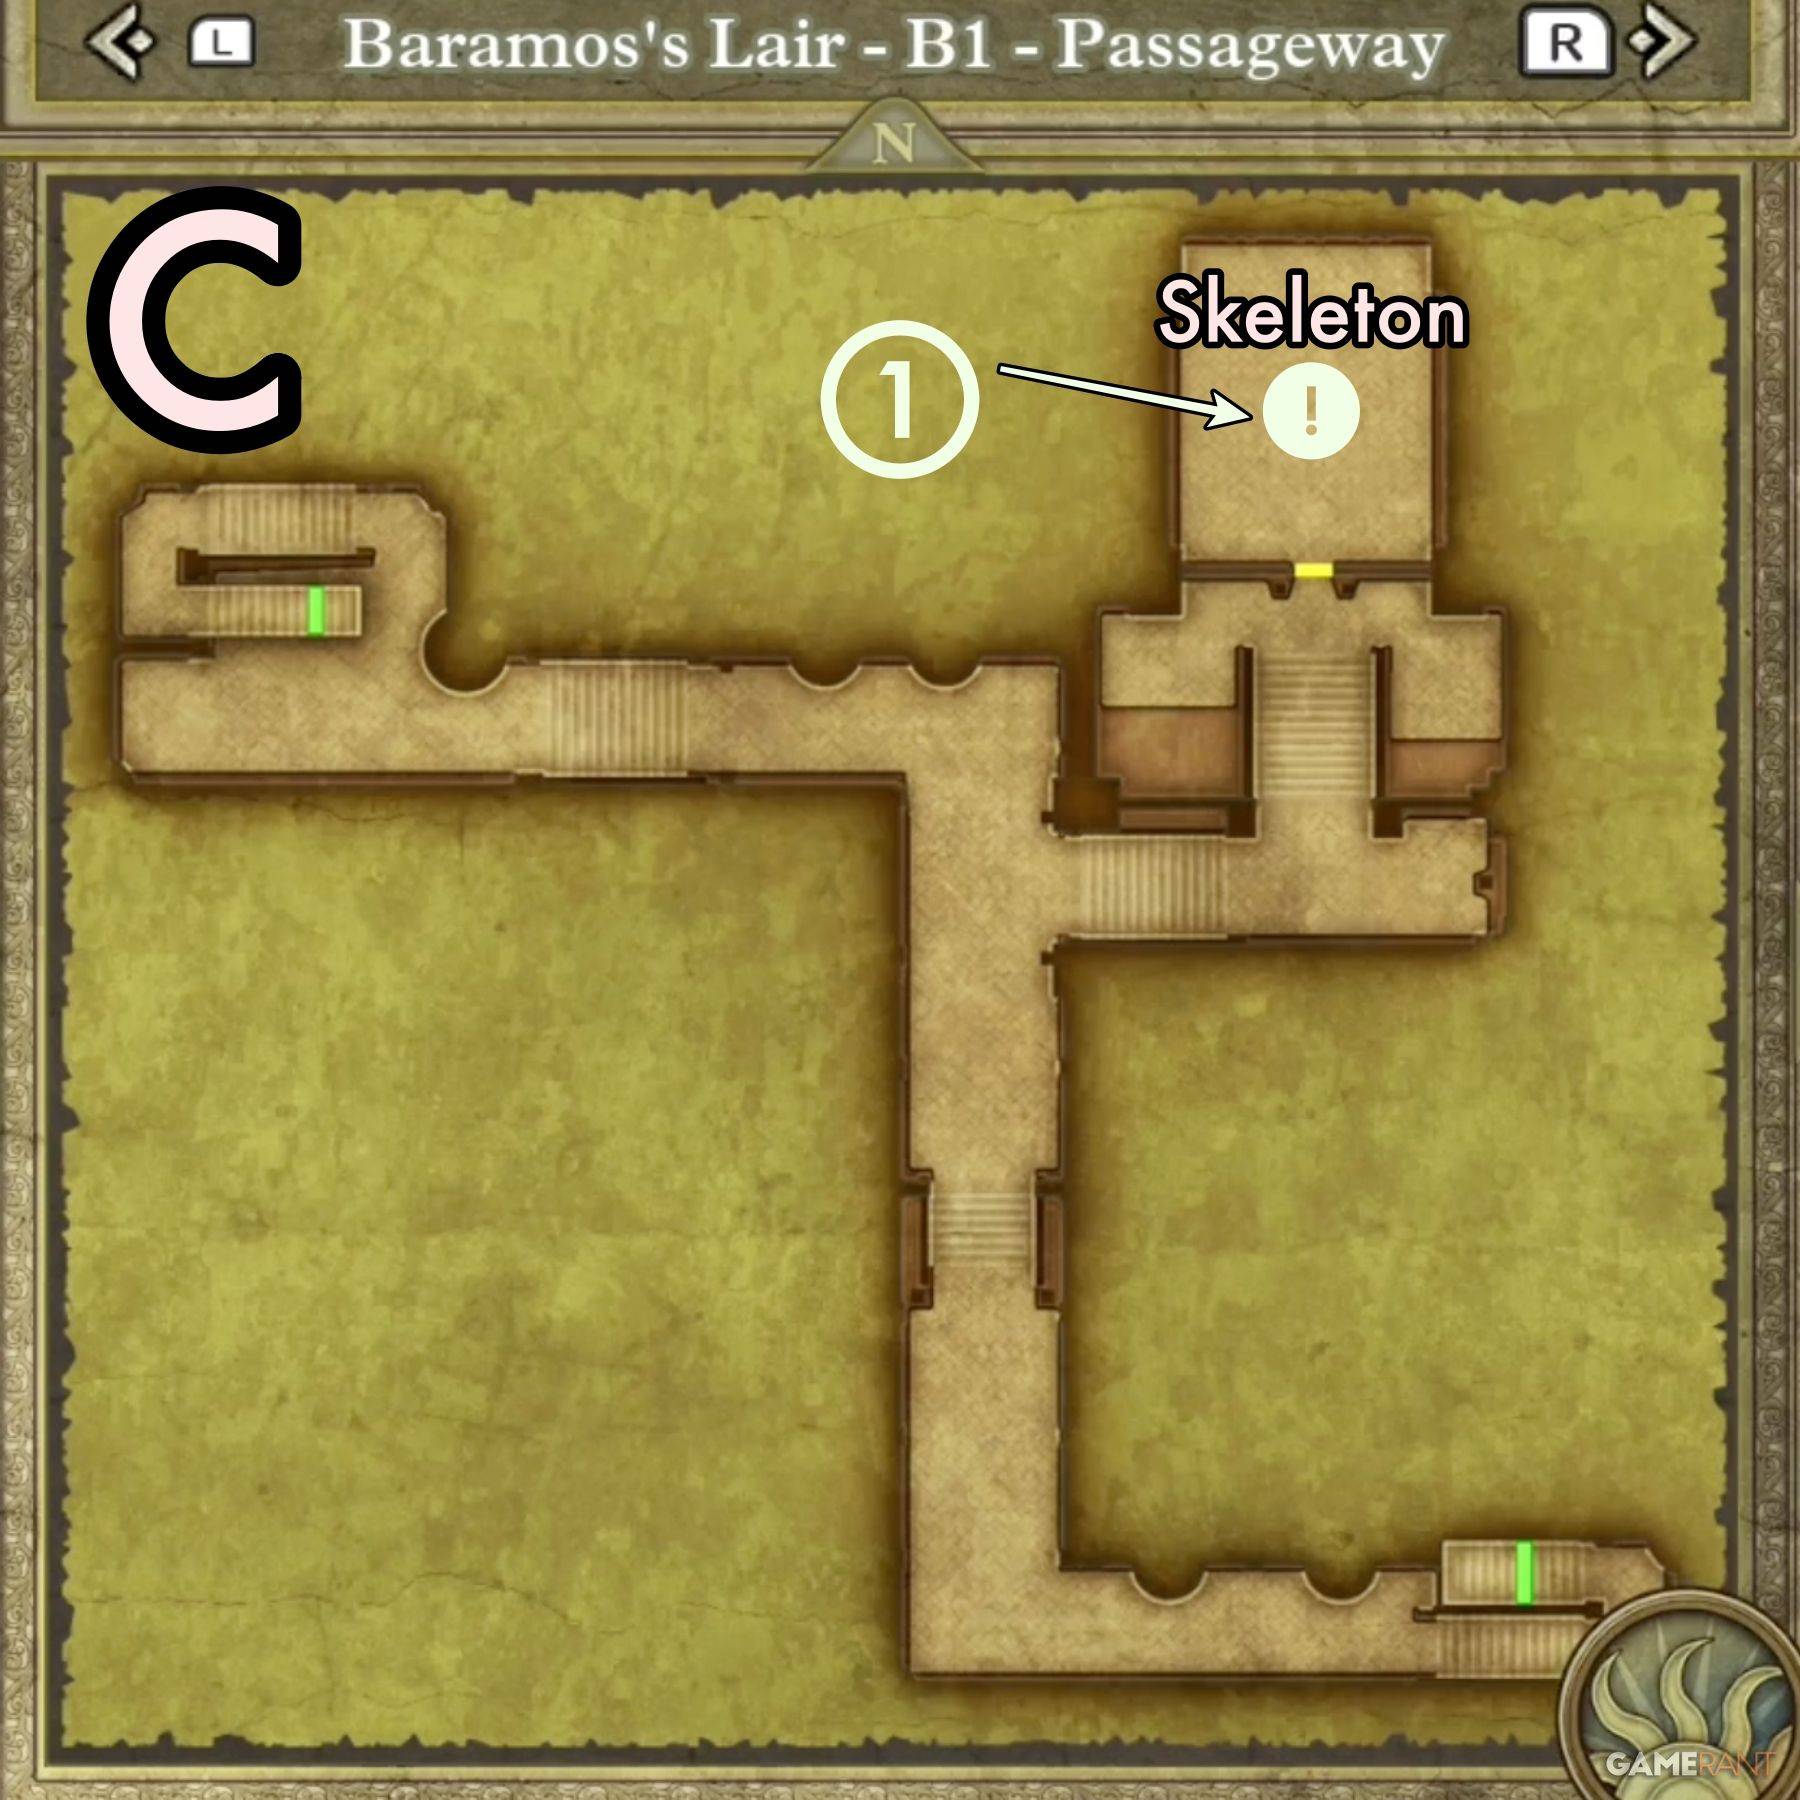
- Treasure 1 (Buried): Mini Medal (On left side of skeleton)
(Access this area from the northern section of the Entrance map via the western staircase.)
Throne Room Treasure:
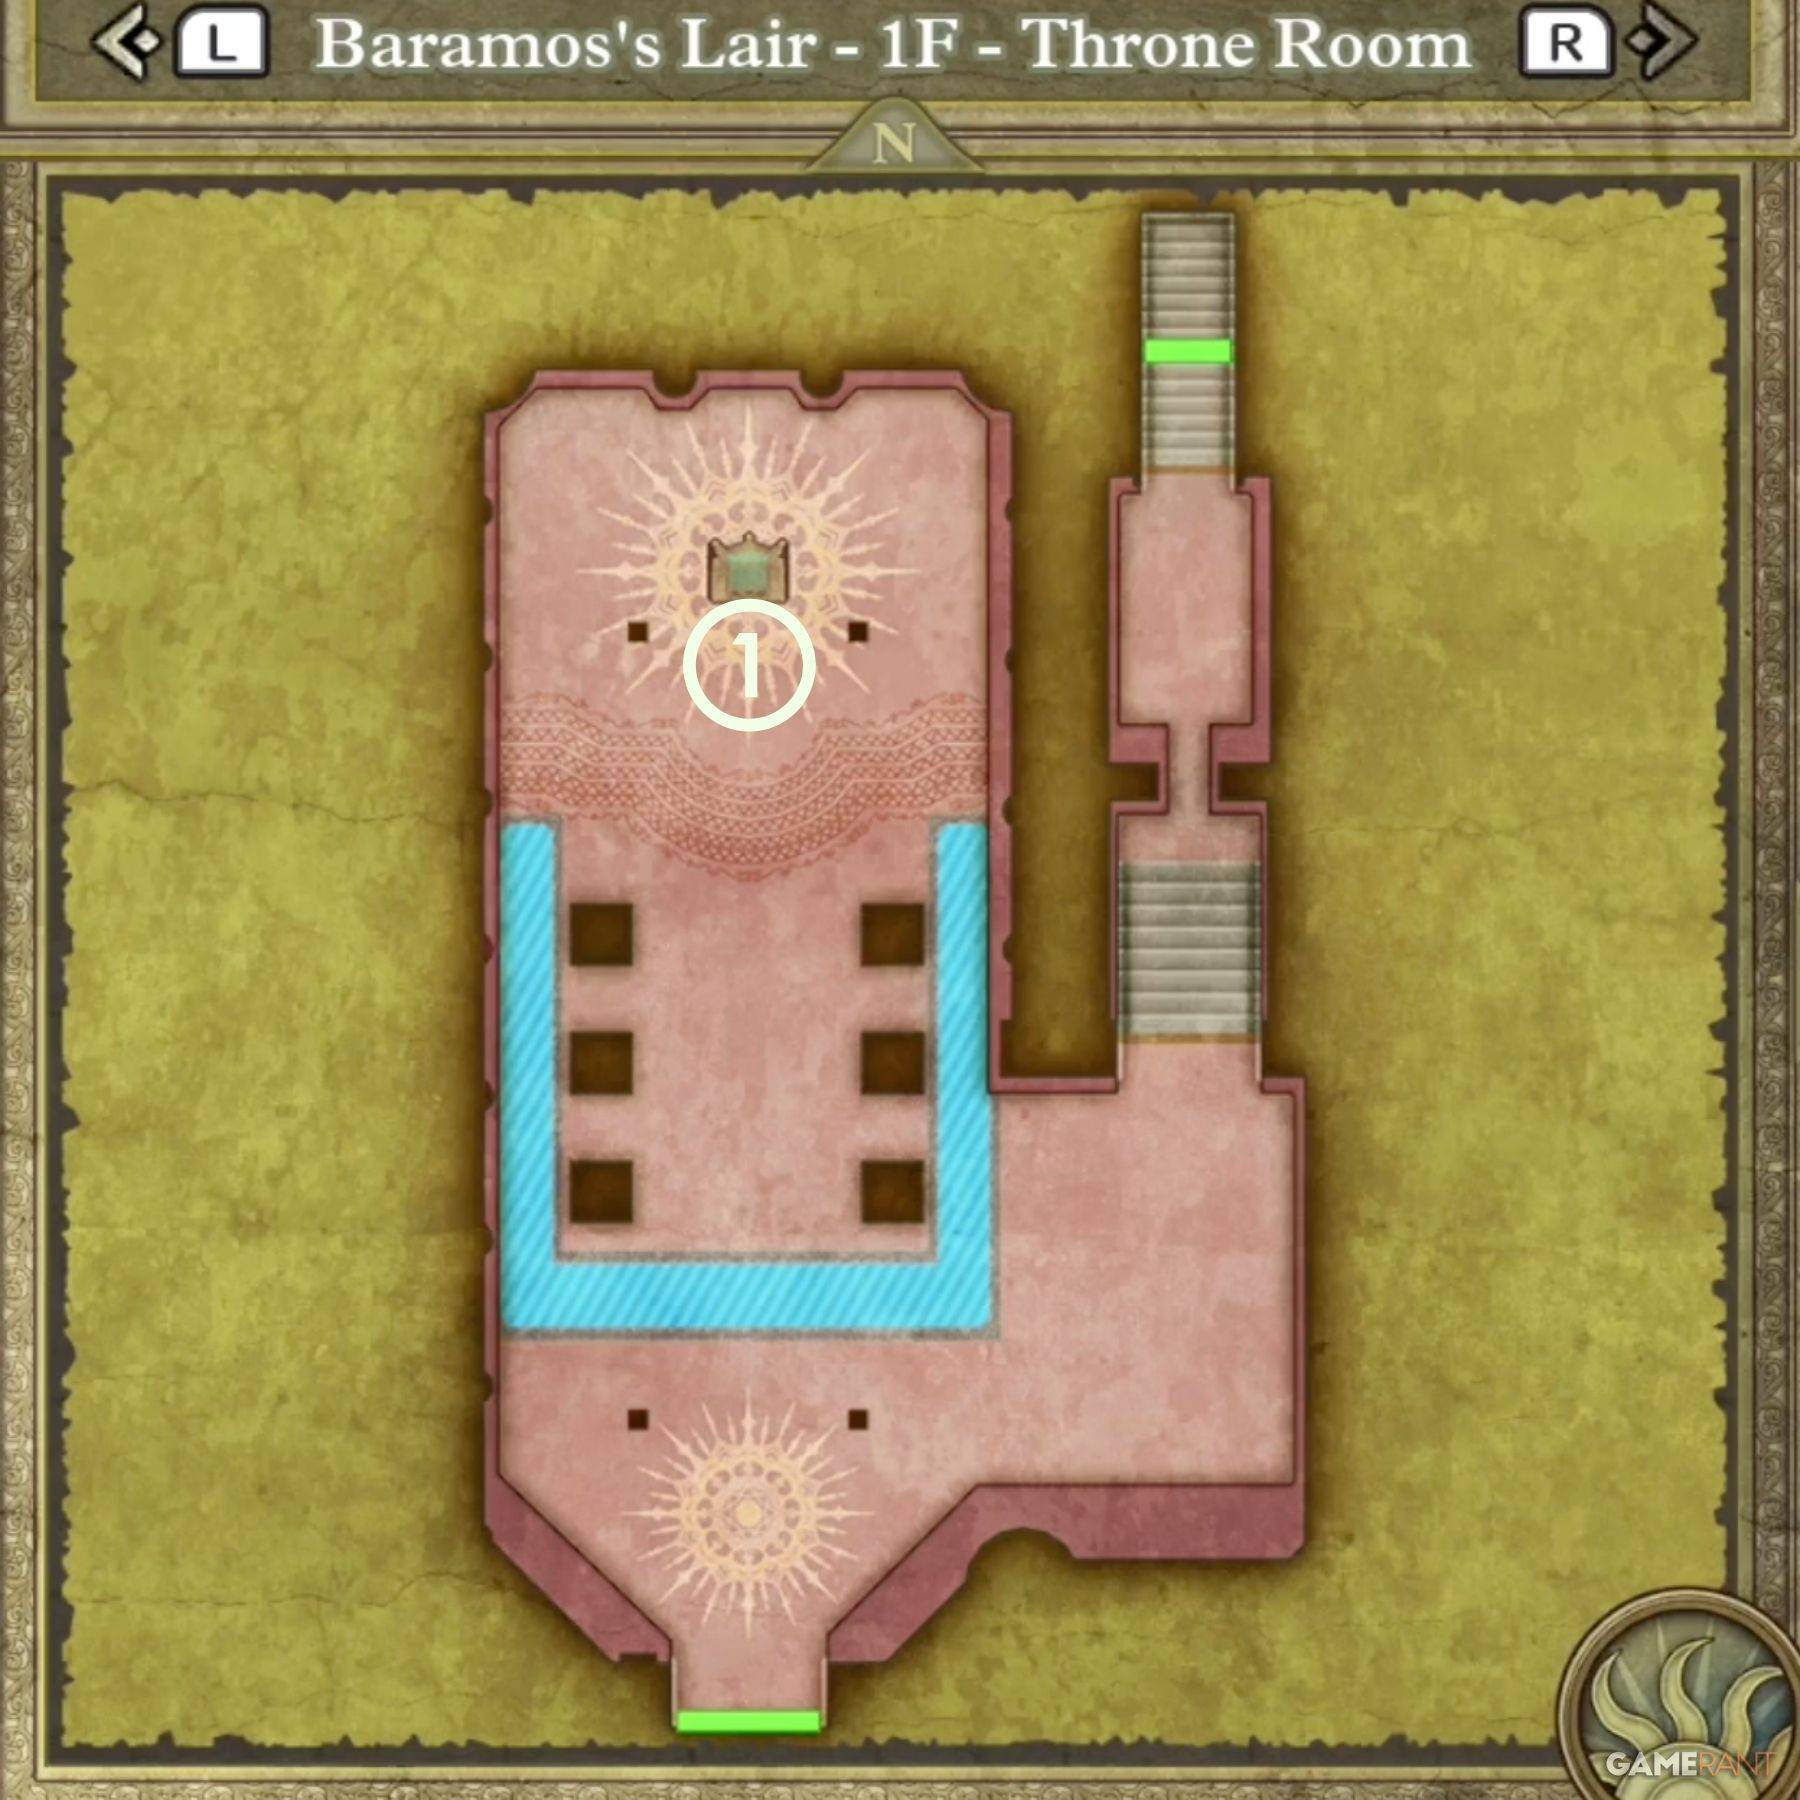
- Treasure 1 (Buried): Mini Medal (in front of throne)
Defeating Baramos
 Baramos presents a significant challenge. Strategic planning and appropriate party levels are crucial.
Baramos's Weaknesses:
Baramos is vulnerable to:
- Crack (Ice-based spells)
- Woosh (Wind-based spells)
Note: Baramos is not weak to Zap. Utilize high-level spells like Kacrack and Swoosh, or Gust Slash. Maintain a dedicated healer to counteract Baramos's potent attacks.
Monster Compendium
| Monster Name | Weakness |
|---|---|
| Armful | Zap |
| Boreal Serpent | TBD |
| Infanticore | TBD |
| Leger-De-Man | TBD |
| Living Statue | None |
| Liquid Metal Slime | None |
| Silhouette | Varies |
This comprehensive guide equips you to successfully navigate Baramos's Lair and emerge victorious. Remember to utilize your party's strengths and exploit Baramos's weaknesses for a smoother encounter.
-
 Apr 15,25"The Last of Us Season 2: Release Date and Streaming Guide" As one HBO primetime show bids farewell (goodbye, The White Lotus), another eagerly steps into the spotlight. Two years following the debut of The Last of Us on Max, this critically acclaimed video game adaptation featuring Pedro Pascal and Bella Ramsey is gearing up for its much-anticipated second
 -
 Jan 20,25‘Dungeons of Dreadrock 2’ Announced, Launching on Nintendo Switch in November with Mobile and PC Versions to Follow Approximately two and a half years ago, we were captivated by the delightful dungeon crawler, Dungeons of Dreadrock, developed by Christoph Minnameier. This top-down perspective game, reminiscent of classics like Dungeon Master and Eye of the Beholder, offered a unique puzzle-solving experience acr
 -
 Dec 10,24Cosplay Marvel Emerges: Elden Ring's Mohg Impresses A stunning Mohg cosplay, strikingly similar to the Elden Ring boss, has been shared online, captivating the gaming community. Mohg, Lord of Blood, a Demigod boss crucial to accessing the recent Shadow of the Erdtree DLC, has enjoyed renewed prominence. Elden Ring, a FromSoftware triumph released in
 -
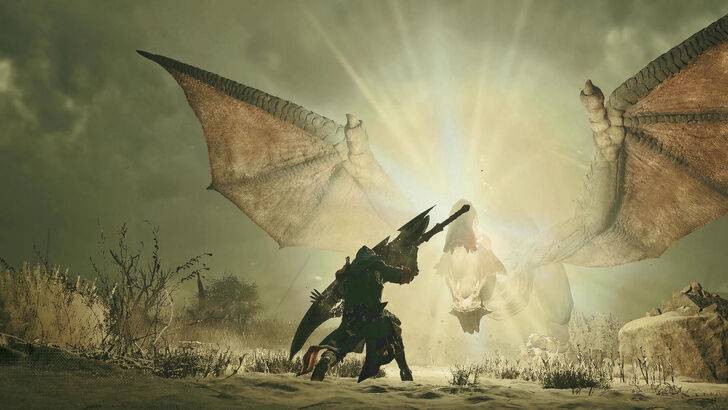 Jan 30,25Hunters Rejoice! Monster Hunter Wilds Showcases New Content In February Open Beta Monster Hunter Wilds: February Open Beta Extends Hunting Opportunities Get ready for another chance to dive into the world of Monster Hunter Wilds! A second Open Beta Test is scheduled for the first two weeks of February, offering both newcomers and returning players a taste of the action before th